
Sewer Camera Inspection Guide
A sewer camera is the closest thing drain work has to an X-ray: a small lens on a cable that shows the inside of your pipe on a screen. This guide explains what it shows, when to book one, and what the report means. Call (833) 878-1592 to book an inspection.
Updated 2026-11-18. Prices shown are estimates only.
What a sewer camera is
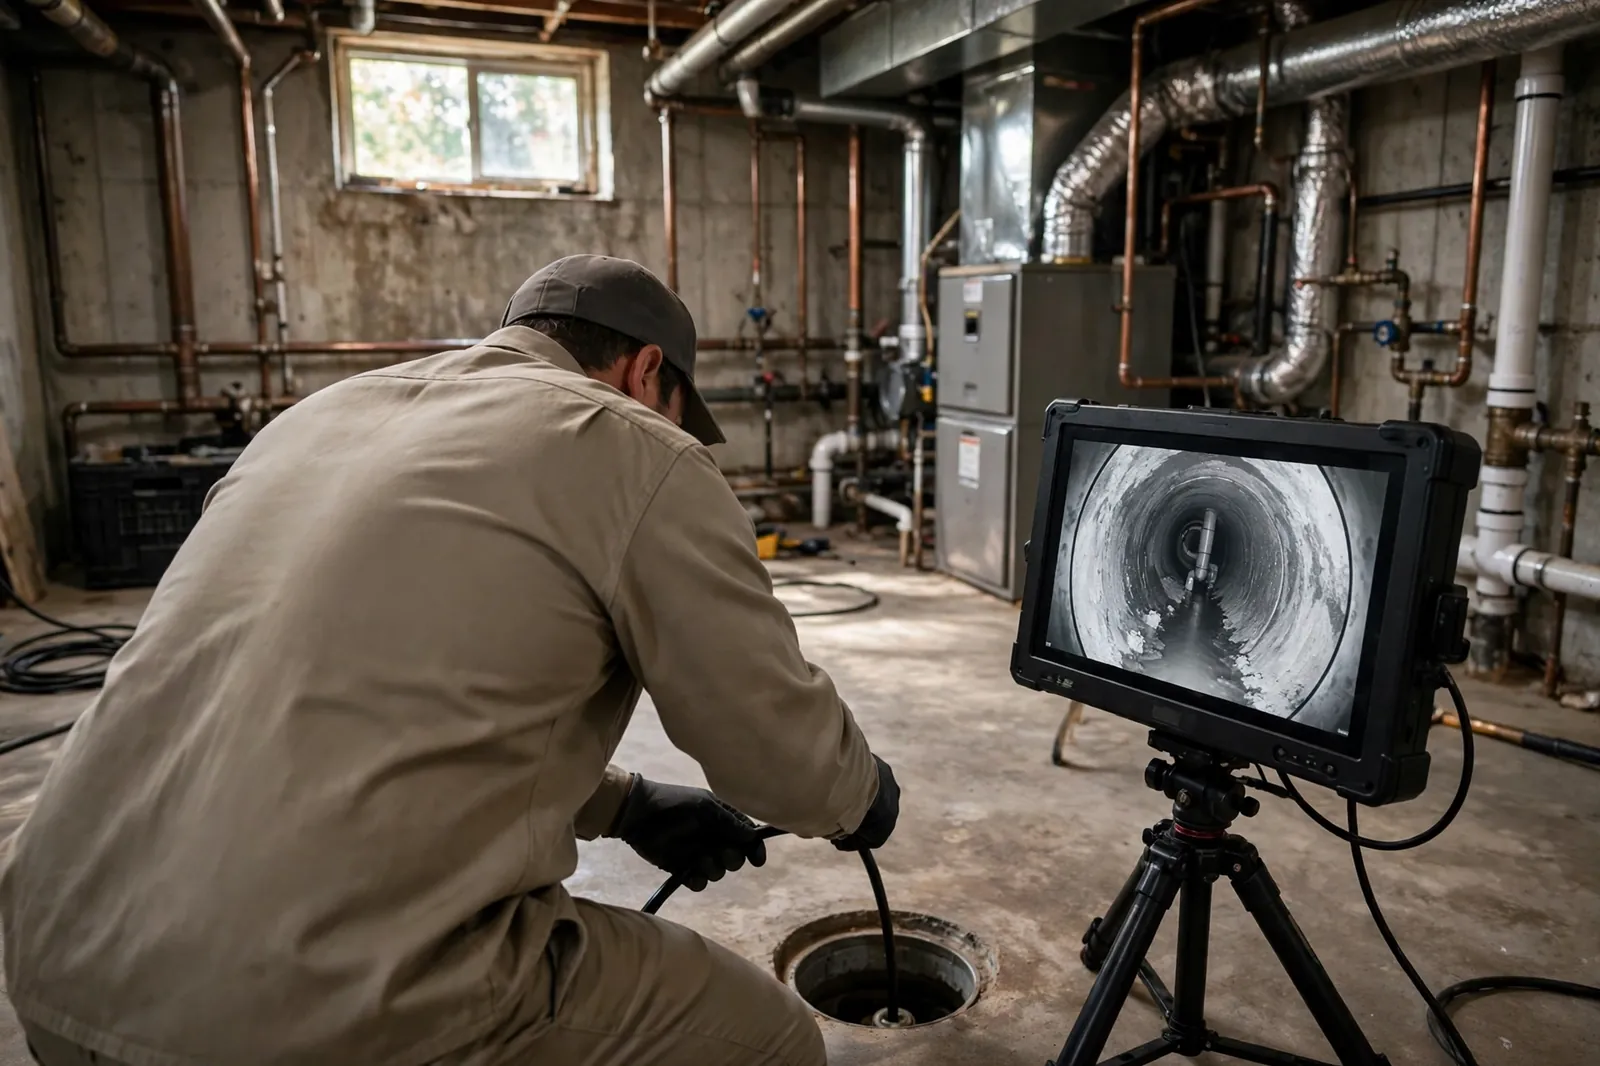
A sewer camera is a small waterproof lens, about the size of a fingertip, mounted on the end of a flexible cable that can be tens of metres long. The operator pushes the cable into the pipe through a cleanout, and the lens sends a live picture to a monitor above ground. A light on the lens illuminates the pipe interior, and a counter on the cable shows how far along the pipe the lens has travelled.
The picture is in colour, and it shows the pipe walls, the water level, the blockage, the joints, and any damage, as the lens passes. It is not a photograph of the outside of the pipe, and it cannot show the soil around it — but for the inside, which is where blockages live, it is the best view there is.
When to book a camera inspection
Book a camera inspection before any jetting job, because it decides the nozzle, the pressure, and whether cleaning is safe. Book one when drains keep blocking, when several fixtures slow at once, when a smell returns, or when a line has blocked twice in a few months. Book one before buying a home with old drains, and between tenancies in a rental, so the pipe's condition is on record.
Book one, too, when a repair is being considered. A camera picture is the basis for a repair quote, and a contractor who quotes a repair without looking inside the pipe is guessing. The inspection costs $150 to $350 as a typical range, often bundled into a jetting visit, and it is the cheapest way to avoid a wrong job.
What the camera shows: blockages
The first thing a camera shows is the blockage itself: grease as a pale, waxy coating; scale as a rough, crusty narrowing; paper and wipes as a matted plug; roots as fine strands or a thick mat. Each looks different on the screen, and each needs a different tool, which is why the inspection comes before the cleaning, not after.
The camera also shows where the blockage sits — how far along the pipe, in feet from the cleanout — and how much of the bore is left open. A plug that leaves a quarter of the bore open is a different job from a plug that leaves almost nothing, and the footage lets the crew plan the passes accordingly.
What the camera shows: pipe condition
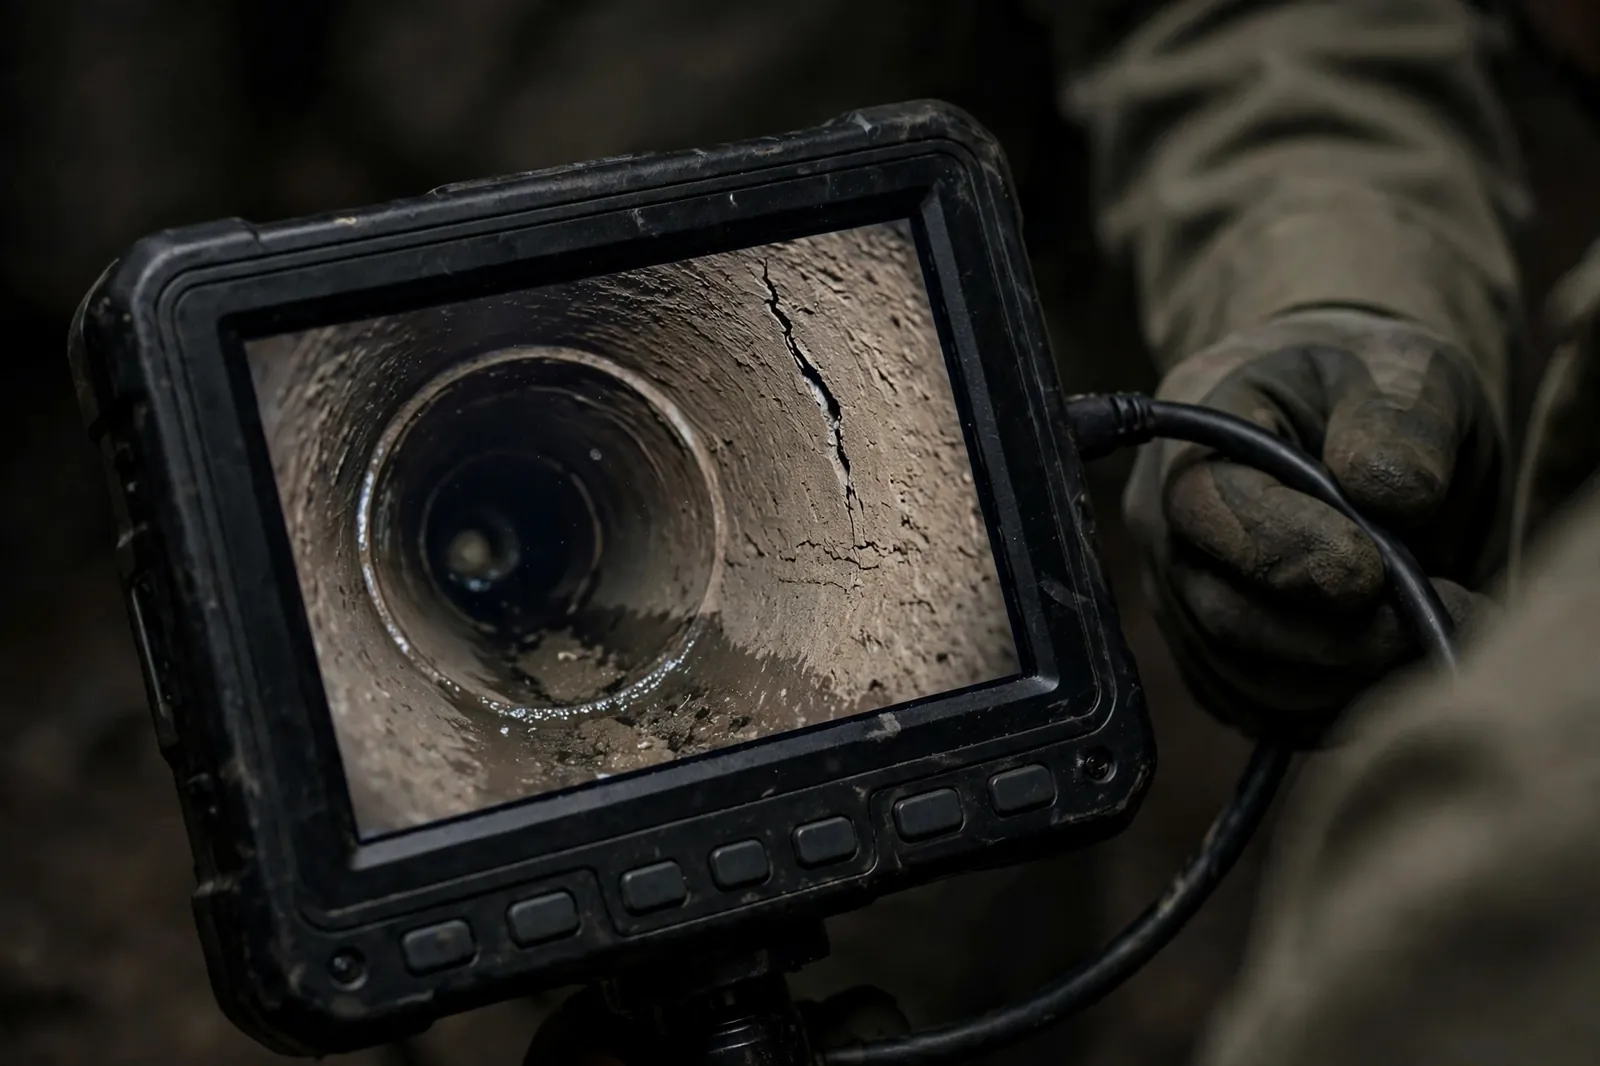
Beyond the blockage, the camera shows the pipe itself: its material, its joints, and its damage. Cracks show as dark lines across the wall. A collapsed section shows as a wall that has fallen into the bore. A sag shows as standing water that does not drain as the camera passes. A joint that has opened shows as a gap with soil or roots visible behind it.
That picture is the difference between cleaning and repair. A coated but sound pipe needs jetting. A cracked or collapsed pipe needs repair, and jetting it at full pressure would make the damage worse. A crew that shows you the damage on the screen is giving you the facts to decide, not a sales pitch.
What the camera cannot show
A camera has limits, and an honest guide should state them. It cannot show the outside of the pipe, the soil around it, or a leak that is not visible from inside. It cannot measure the exact thickness of a pipe wall, and it cannot always tell one pipe material from another if the interior is heavily coated. In a pipe full of standing water, the lens may see only murk until the water is cleared.
It also cannot see around a bend it cannot pass, or past a blockage it cannot get through. In those cases the operator may clear a path first — with a snake or a gentle jet — and then run the camera through the opened line. The inspection is a powerful tool, but it is not magic, and a crew that claims it shows everything is overselling it.
Reading the report and the footage
After the inspection, ask for two things: the footage, and a short report. The report should say, in plain words, what was found: the blockage type, the worst stretch and its distance from the cleanout, the pipe material and condition, and any damage. It should also say what the operator recommends — jetting, repair, or a recheck — and when.
Watch the footage yourself, even briefly. A homeowner who has seen the coating or the roots on a screen understands the problem in a way a written report alone cannot convey, and the next time a plumber talks about the line, the picture is already in your mind. Keep the footage and the report together, dated, in the house file.
Camera inspection and jetting together
A camera inspection is usually done twice on a jetting job: once before, to plan the clean, and once after, to prove it. The before picture decides the nozzle and the pressure; the after picture shows clean walls and an open bore. The pair of pictures is the record of the job, and it is worth asking to see both on the monitor before the crew leaves.
Many crews bundle the inspection into the jetting price, so ask what is included when you book. A quote that lists the camera work separately is not a worse quote — it is a clearer one — and the inspection on its own, at $150 to $350 as a typical range, is money well spent even when no jetting follows, because it tells you what the pipe needs.
Camera inspection before buying or renting
Before buying a home, a camera inspection of the sewer line is one of the cheapest checks available. A line that looks fine from the outside can be coated, root-filled, or cracked inside, and a repair found after purchase is the buyer's bill. An inspection before purchase, with the footage on file, turns a hidden risk into a known fact, and it can be a basis for a price discussion.
For a rental, an inspection between tenancies does the same: it records the pipe's condition at handover, so a blockage in the new tenancy can be judged against a known starting point. Landlords and tenants both benefit from that record, and the cost is small against the cost of a dispute over who caused a blockage.
Keeping the record and using it next time
File the footage, the report, the date and the quote together, and keep them where the next plumber can see them. A crew that starts with that record does not need to re-learn your line: it knows the material, the worst stretch, the weak joint, and when the last clean was. The next visit is quicker, the quote is more accurate, and the decision — clean, recheck, or repair — is made from facts, not from scratch.
That file is also the basis for a permit application, if a repair follows, and for a conversation with an association or a landlord about a shared line. A pipe with a record is a pipe that can be managed; a pipe without one is a pipe that surprises you, usually on a weekend.
How the camera gets into the pipe
A sewer camera enters the pipe through the cleanout — the capped pipe at ground level that gives access to the main line. The operator opens the cap, feeds the camera cable in by hand, and pushes it along the line while watching the picture on a screen. The cable is flexible enough to follow bends, and the lens at the end carries its own light, so the picture stays clear even in a dark pipe. Most home cameras can travel 100 feet or more, which is enough to reach the street from the house in most homes. The operator pushes the cable slowly, so the picture is steady and the joints, the coating, and any damage are easy to see.
If the home has no cleanout, the camera can go in through a toilet — the toilet is pulled, the camera is fed through the flange, and the toilet is refitted afterwards — or down a roof vent, though both take longer and cost more. A home with a cleanout is a home that is easy to inspect, which is one more reason to fit one if yours is missing. The entry point matters for a second reason: the camera can only show the pipe from where it enters, so a camera fed from the house shows the run to the street, while a camera fed from a branch shows only that branch. Tell the operator which runs you want seen before they start, so the inspection covers the whole line and not just the first few feet.
What a good inspection report contains
A good inspection report is more than a verbal summary. It should contain the video file itself, or a link to it, so you can watch the run whenever you need to. It should name the pipe material in each section — PVC, cast iron, clay — and the diameter where it changes. It should note the distance from the entry point to each feature, so a problem can be found again without a second inspection. It should list what was found: coating, roots, scale, cracks, offset joints, bellies, and standing water, each with its location. And it should end with a plain recommendation: clean, repair, or monitor, with the reason given in one sentence.
The distance markers are the part most often missing, and they are the part that matters most for the next visit. A report that says "roots at 40 feet" lets the next crew go straight to the spot. A report that says "roots somewhere in the line" is almost useless. The locator reading — the depth of the pipe at each feature — is useful too, because it tells a repair crew how deep they will have to dig. Ask for the report in writing, with the footage, before the crew leaves. A crew that hands over a proper report is a crew that stands behind its work, and the report is the record that makes every later decision cheaper and faster.
Camera inspections for buyers: what to ask for
A sewer camera inspection is one of the most useful checks a home buyer can order, because the sewer line is one of the most expensive parts of a house to repair and one of the few that a standard viewing cannot show. The inspection should cover the main line from the house to the street, and the report should name the pipe material, the age where it can be judged, and any coating, roots, cracks, or bellies. If the footage shows a sound pipe, the buyer has peace of mind and a baseline record for the years ahead. If it shows a break or a collapsed section, the buyer has evidence to negotiate the price or ask the seller to repair it before completion.
Ask for three things when you book a pre-purchase inspection. First, the full video file, not just a summary — the file is the evidence. Second, the distance markers, so any problem can be located again. Third, a written opinion on whether the line needs cleaning, repair, or nothing at all, and what each would cost in typical ranges. A main line clean usually runs $350 to $900, while a repair of a damaged section costs far more, and the difference is worth knowing before you sign. Order the inspection early in the buying process, so there is time to act on what it finds. A camera look costs a fraction of a sewer repair, and it is the cheapest insurance a buyer can buy.
How long does the footage stay useful?
Camera footage stays useful for years, because pipes change slowly. A clean pipe filmed today will look much the same in two years, and a coated pipe filmed today will show how fast the coating returns when it is filmed again. The footage is most useful when it is compared: the closing picture after a clean against the picture a year later, or the pre-purchase picture against the picture after five years of living in the house. The comparison is what turns a single inspection into a record of how your pipes age.
Keep the footage with the date, the address, and the name of the company that filmed it. Store the file where you can find it — a folder on your computer, or a cloud drive — and keep the written report with it. The file format matters less than the habit: a video that cannot be found is no use to anyone. When you sell the house, the footage is worth handing to the buyer, because it shows the state of the lines and the care they have had. A home with a filmed, dated record of its drains is a home a buyer can trust, and the record costs nothing to keep once the inspection is done.
The camera and the jetter: why the order matters
The camera and the jetter are a pair, and the order they are used in matters. The camera goes first, because it shows what is in the pipe and lets the operator choose the pressure, the nozzle, and the approach. The jetter goes second, and it does the cleaning. The camera goes last, because the closing run proves the line is clean and shows whether the pipe is sound. A job that skips the first camera run is a job done blind, and a job that skips the last one is a job with no proof. Both runs take minutes, and both are worth insisting on.
The two tools also protect each other. The camera protects the jetter, because it shows the weak spots that high pressure could damage. The jetter protects the camera, because a clean pipe gives a clearer picture than a coated one — and the next inspection is easier to read when the walls are clean. Together they are the standard of care for drain work: look, clean, look again. If a crew offers to jet without a camera, or to clean without a closing run, ask why. The answer will tell you whether the crew is cutting a corner or whether there is a genuine reason, and a genuine reason is rare. The how hydro jetting works guide explains the cleaning step in detail, and the cost guide lists the typical ranges for a camera inspection on its own.
Signs you may need hydro jetting
- Drains keep blocking despite repeated clearings.
- Several fixtures slow at once, in different rooms.
- A drain smell returns around a low fixture.
- A line has blocked twice within a few months.
- You are buying a home with old drains.
- A repair quote has been given without anyone looking inside.
- A report with no footage attached.
- A verbal summary with no written findings.
- A camera look that skipped the far end of the line.
- A report that never names the pipe material.
- Footage with no distance markers.
- An inspection done without a locator reading.
How it works
- 1
Step 1 — Book the inspection
Call (833) 878-1592 and book a camera inspection before any jetting or repair, so the work is planned from a picture of the pipe.
- 2
Step 2 — Watch and ask
Watch the monitor with the operator, ask what each stretch shows, and ask for the footage and a short written report.
- 3
Step 3 — File the record
Keep the footage, the report, the date and the quote together, so the next visit starts from facts, not from scratch.
- 4
Step 4 — Ask for the file, not just a viewing
Ask for the full video file and the written report before the crew leaves, and check that the file plays and the report names the pipe material and the distances.
- 5
Step 5 — Compare the next inspection against this one
At the next inspection, watch the new footage side by side with this one — the comparison shows how fast your line builds up and sets the interval.
What does it cost?
A camera inspection is the cheapest way to avoid a wrong job. Typical ranges for inspection and jetting are shown as estimates.
| Service | Typical range (estimate) | Notes |
|---|---|---|
| Camera inspection | $150 – $350 | On its own or bundled |
| Branch line jetting | $250 – $550 | One sink or bath line |
| Main line hydro jetting | $350 – $900 | Whole-home line |
Prices are estimates only. The local company that does the work sets its own final pricing.